Sorry this has been so slow in coming - busy week at our house!! Four kids will do that to you. As a side note - Tara and I went to see "Wicked" Sunday night - it was phenomenal!! I really loved it - the cast, costumes, set, music - it was an amazing experience. I need sparkly emerald green everything now. Lol. I also enjoyed my time with Tara - we got in lots of good girl talk, and it's amazing how one night like that can refresh you to face the week ahead!!!!
Okay. Today is one of those terrible fall days that makes it crystal clear winter is not far away. Very chilly and rainy. I'm wearing my winter uniform - a cardigan over a tshirt, jeans, boots, and a scarf. I don't know what I did before the scarf rose in popularity. I live in them from October to March, maybe April. Last year, I looked for tutorials online for them, and could never find one I was totally happy with. So I took bits and pieces, figured out what I thought worked - and this is the result. A super easy infinity scarf.
You will need one yard of fabric and matching thread. That's it!!! I prefer to do this with a knit, just for the softness and the way it lays, but you can do it with cotton or whatever strikes your fancy. I keep thinking a soft plaid flannel would be fun to try.
This fabric is more like a sweatshirt material. I loved the stripe. But it may not have been the best thing to use for a tutorial, so I'll try to be clear as possible.
Lay your fabric out, folded in half, like you bought it off the bolt.
Cut the fabric on the fold, so you will end up with two pieces, each one yard long.
Place these pieces together, right sides together. You are going to make a straight stitch all the way down to end up with one looooong rectangle with a seam in the middle. I used a half inch seam allowance on this project.
Please become familiar with your back stitch on your machine, if you haven't already. I was shocked to find out some people don't use it. It will improve the quality of anything you sew.
Once you have this done, I would press the seam out.
Next we are going to fold the fabric in half lengthwise. The easiest way to do this is take both ends of the seam you just made, and, right sides together, line the seams up and pin. Pinning will help you keep all two yards where they need to be.
Starting from that seam, line up the raw edges of the fabric and pin them together all the way down to each end.
My mom - I mean Santa - put those adorable pins in my stocking last Christmas. I think she must have known about my future in blogging. Lol.
Sew all the way down the pinned side. You will end up with a two yard long tube of fabric.
This is my tube kind of folded up. Turn it right side out.
Now, some tutorials will have you do some fancy and confusing twisting thing at this point. I don't see the need. Just take the ends of the tube, put the seams together (right sides together) and pin.
I like to start stitching at the seam. I am a little type A - there is no scientific reason to start there. Just my own neurotic habit. Here's the only tricky part. You are going to stitch both ends of the tube together this way, but only as far as you can. We will have to finish by top stitching.
See? Starting at the seam. I have to do it.
It's tricky on this part to pin all around, so go slowly and line up the raw edges as you go, like I did in this picture above.
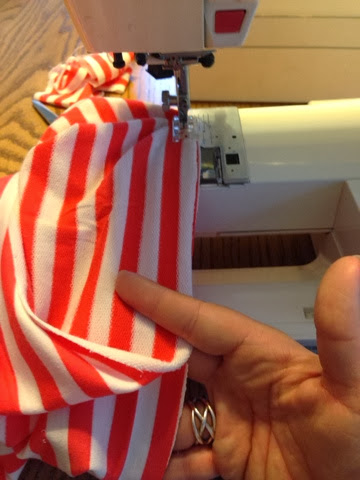
When it looks like this, and you can't go any farther, back stitch and get out of there. Unfold and straighten it all up, laying it flat so you have the unfinished section in front of you.
If you look closely at this picture, you can see I have folded the raw edge down, so it is even with the rest of the seam. You are going to do that on both sides.
And then pin. You will top stitch the part that isn't finished.
I used a very small stitch allowance here, as small as I could while still making sure I got all the layers caught in the stitch.
This is what my finished seam looks like. Not super gorgeous, but odds are no one will see it while you are wearing it. I usually stick the seams at the back of my neck to hide them.
You are done!! Once you figure this out, it will only take you about 15 minutes to whip these babies out!! The second picture, I even triple-wrapped it. And you can play with the length of the fabric you start with. For little girls, use 1/3 yard, and you will skip the first step - just stitch the sides together in the tube as your first step. Your scarf collection will blossom in no time.
Happy sewing!!!!
-k-


No comments:
Post a Comment